Have you ever wanted to create an app? One that you have always wanted, one that you need and would use often? Like most of my generation, using apps every day has made me critique every digital product that comes across my phone. But this week I allowed myself to dream up an app I have always wanted.
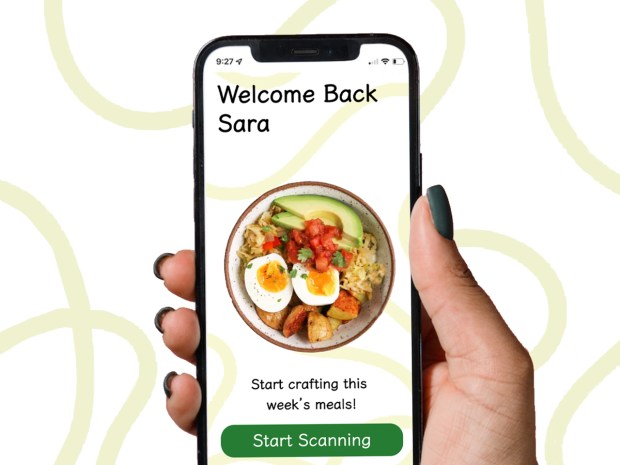
The app that I need would be called Pantry Planner. It would allow users to take photos of their pantry and fridge, and then the app would create a meal plan for seven days. Once the user approves all the meals, the app would then create a grocery list of items that the user doesn’t have at home. The purpose of this app allows users to save time figuring out what to make each day and its geared toward people shopping within a budget. Not only will it save you mental stress, but the app will choose meals based on ingredients you already have, creating less food waste and a shorter grocery list each week.
The Ideation Process
The creation of Pantry Planner started out with just a simple idea of turning photos into recipes. But I wanted to expand on this, so I used three ideation methods to help me organize my thoughts and brainstorm. Ideation methods can help with almost any project and focus on generating as many ideas as possible, good or bad. As you can always go back and modify or expand what you come up with. The three methods which I will describe shortly, helped me turn this simple idea into a detailed product that can service a wide audience.
Ideation Method 1: Mind Map
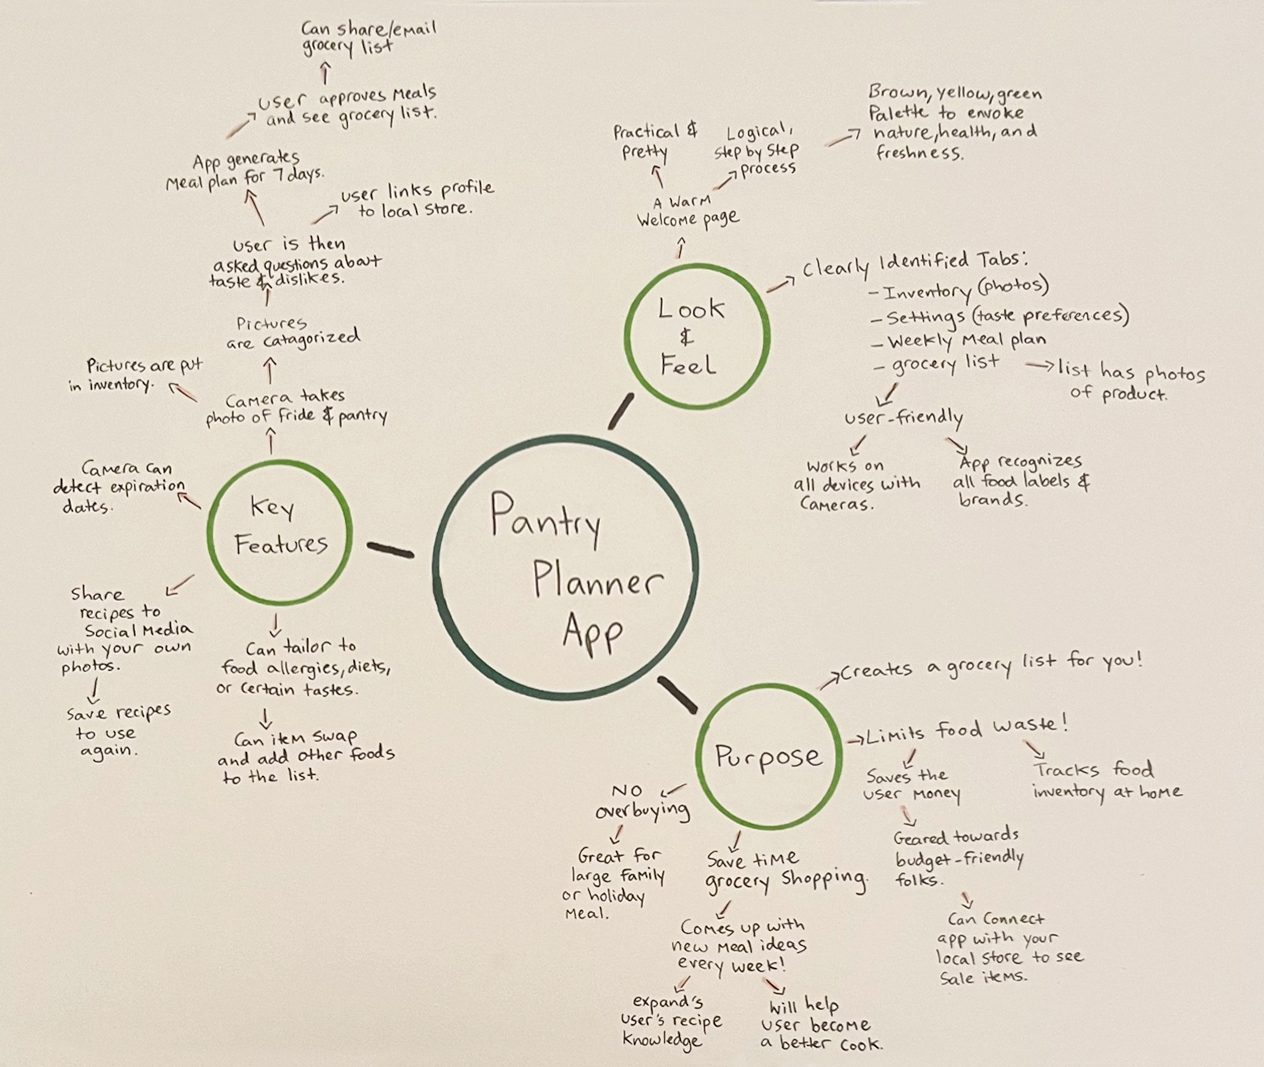
I started out creating a mind map. This allowed me to get the many thoughts in my head down on paper. It also let me create connections between ideas. For my mind map, I focused on three categories: key features, look and feel, and purpose. For key features, I wrote down the typical process a user would have. From taking the photos, from approving the meal plan, to viewing the grocery list. It was when I was creating this list, that I also came up with the idea that the app could also link to the local supermarket flyer, so that meals and ingredients could be picked based on what was on sale.
For the look and feel category I focused on color scheme and what the app would look like. I knew I wanted warm, natural colors and allow the photos of food be the star of the show.
I also clearly defined the app’s purpose. Since I had already thought about this earlier, I knew it would save time grocery shopping. But the more I continued with the mind map I realized that it was doing a lot more than that… this app would prevent people from overbuying, allow the person to expand their recipe knowledge, assist them in becoming a better cook, and limit their food waste. There are plenty of upsides to this app.
Ideation Method 2: Sketchstorm
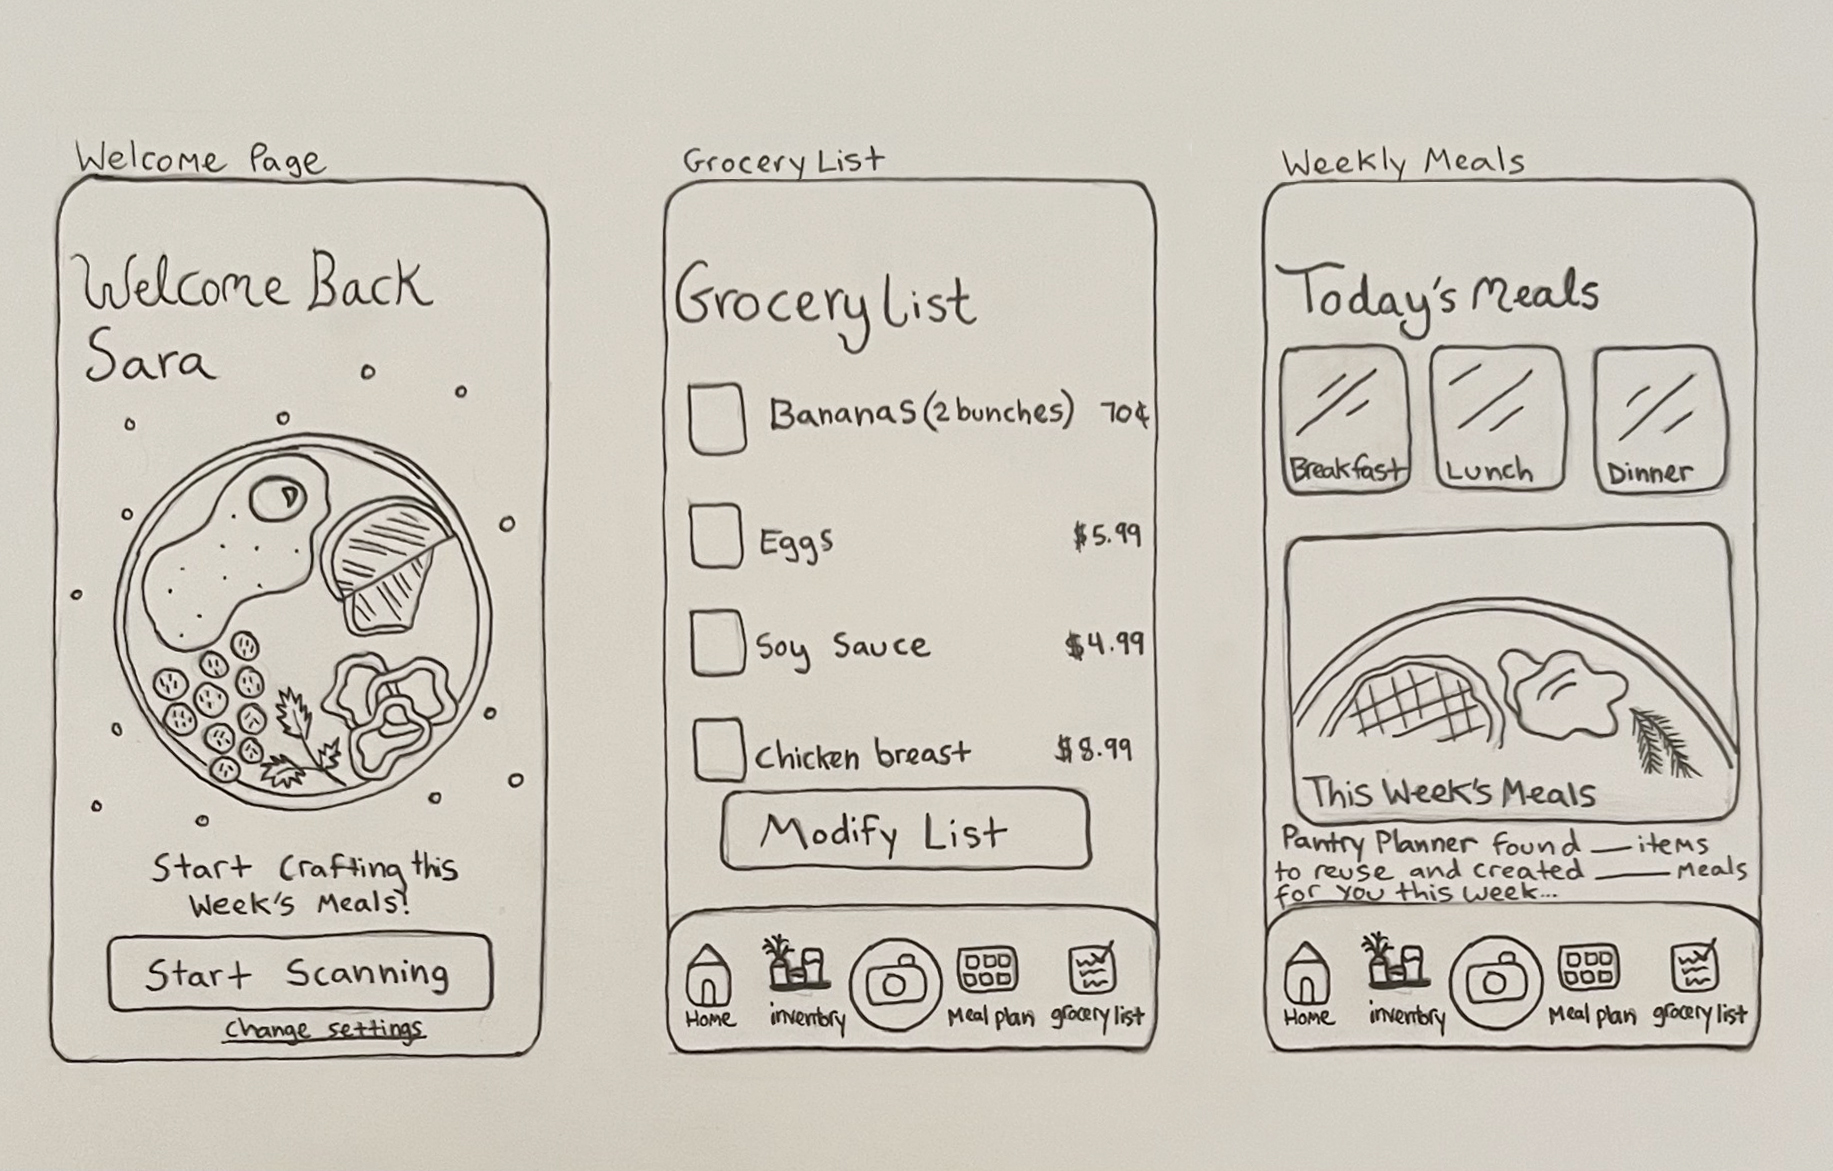
After I moved on to sketching…this is also known as sketchstorming. Here, I took my mind map and turned my ideas into visuals. I planned on sketching out three screens a user might see if they purchased the app. One was the home page, and the others were the grocery list and the meal plan page. What I discovered in the sketching process was that getting all my ideas for each page to fit was a challenge. I knew for the meal plan page it would be best to break up today’s meals and then have a separate section for the entire weeks’ worth of meals. As you can see by my sketch, today’s meals are at the top, allowing quick access to the recipes by clicking on breakfast, lunch, or dinner. Sketching gave me a preview of how key pieces would be spaced out and how user interaction would go.
Ideation Method 3: Prototyping
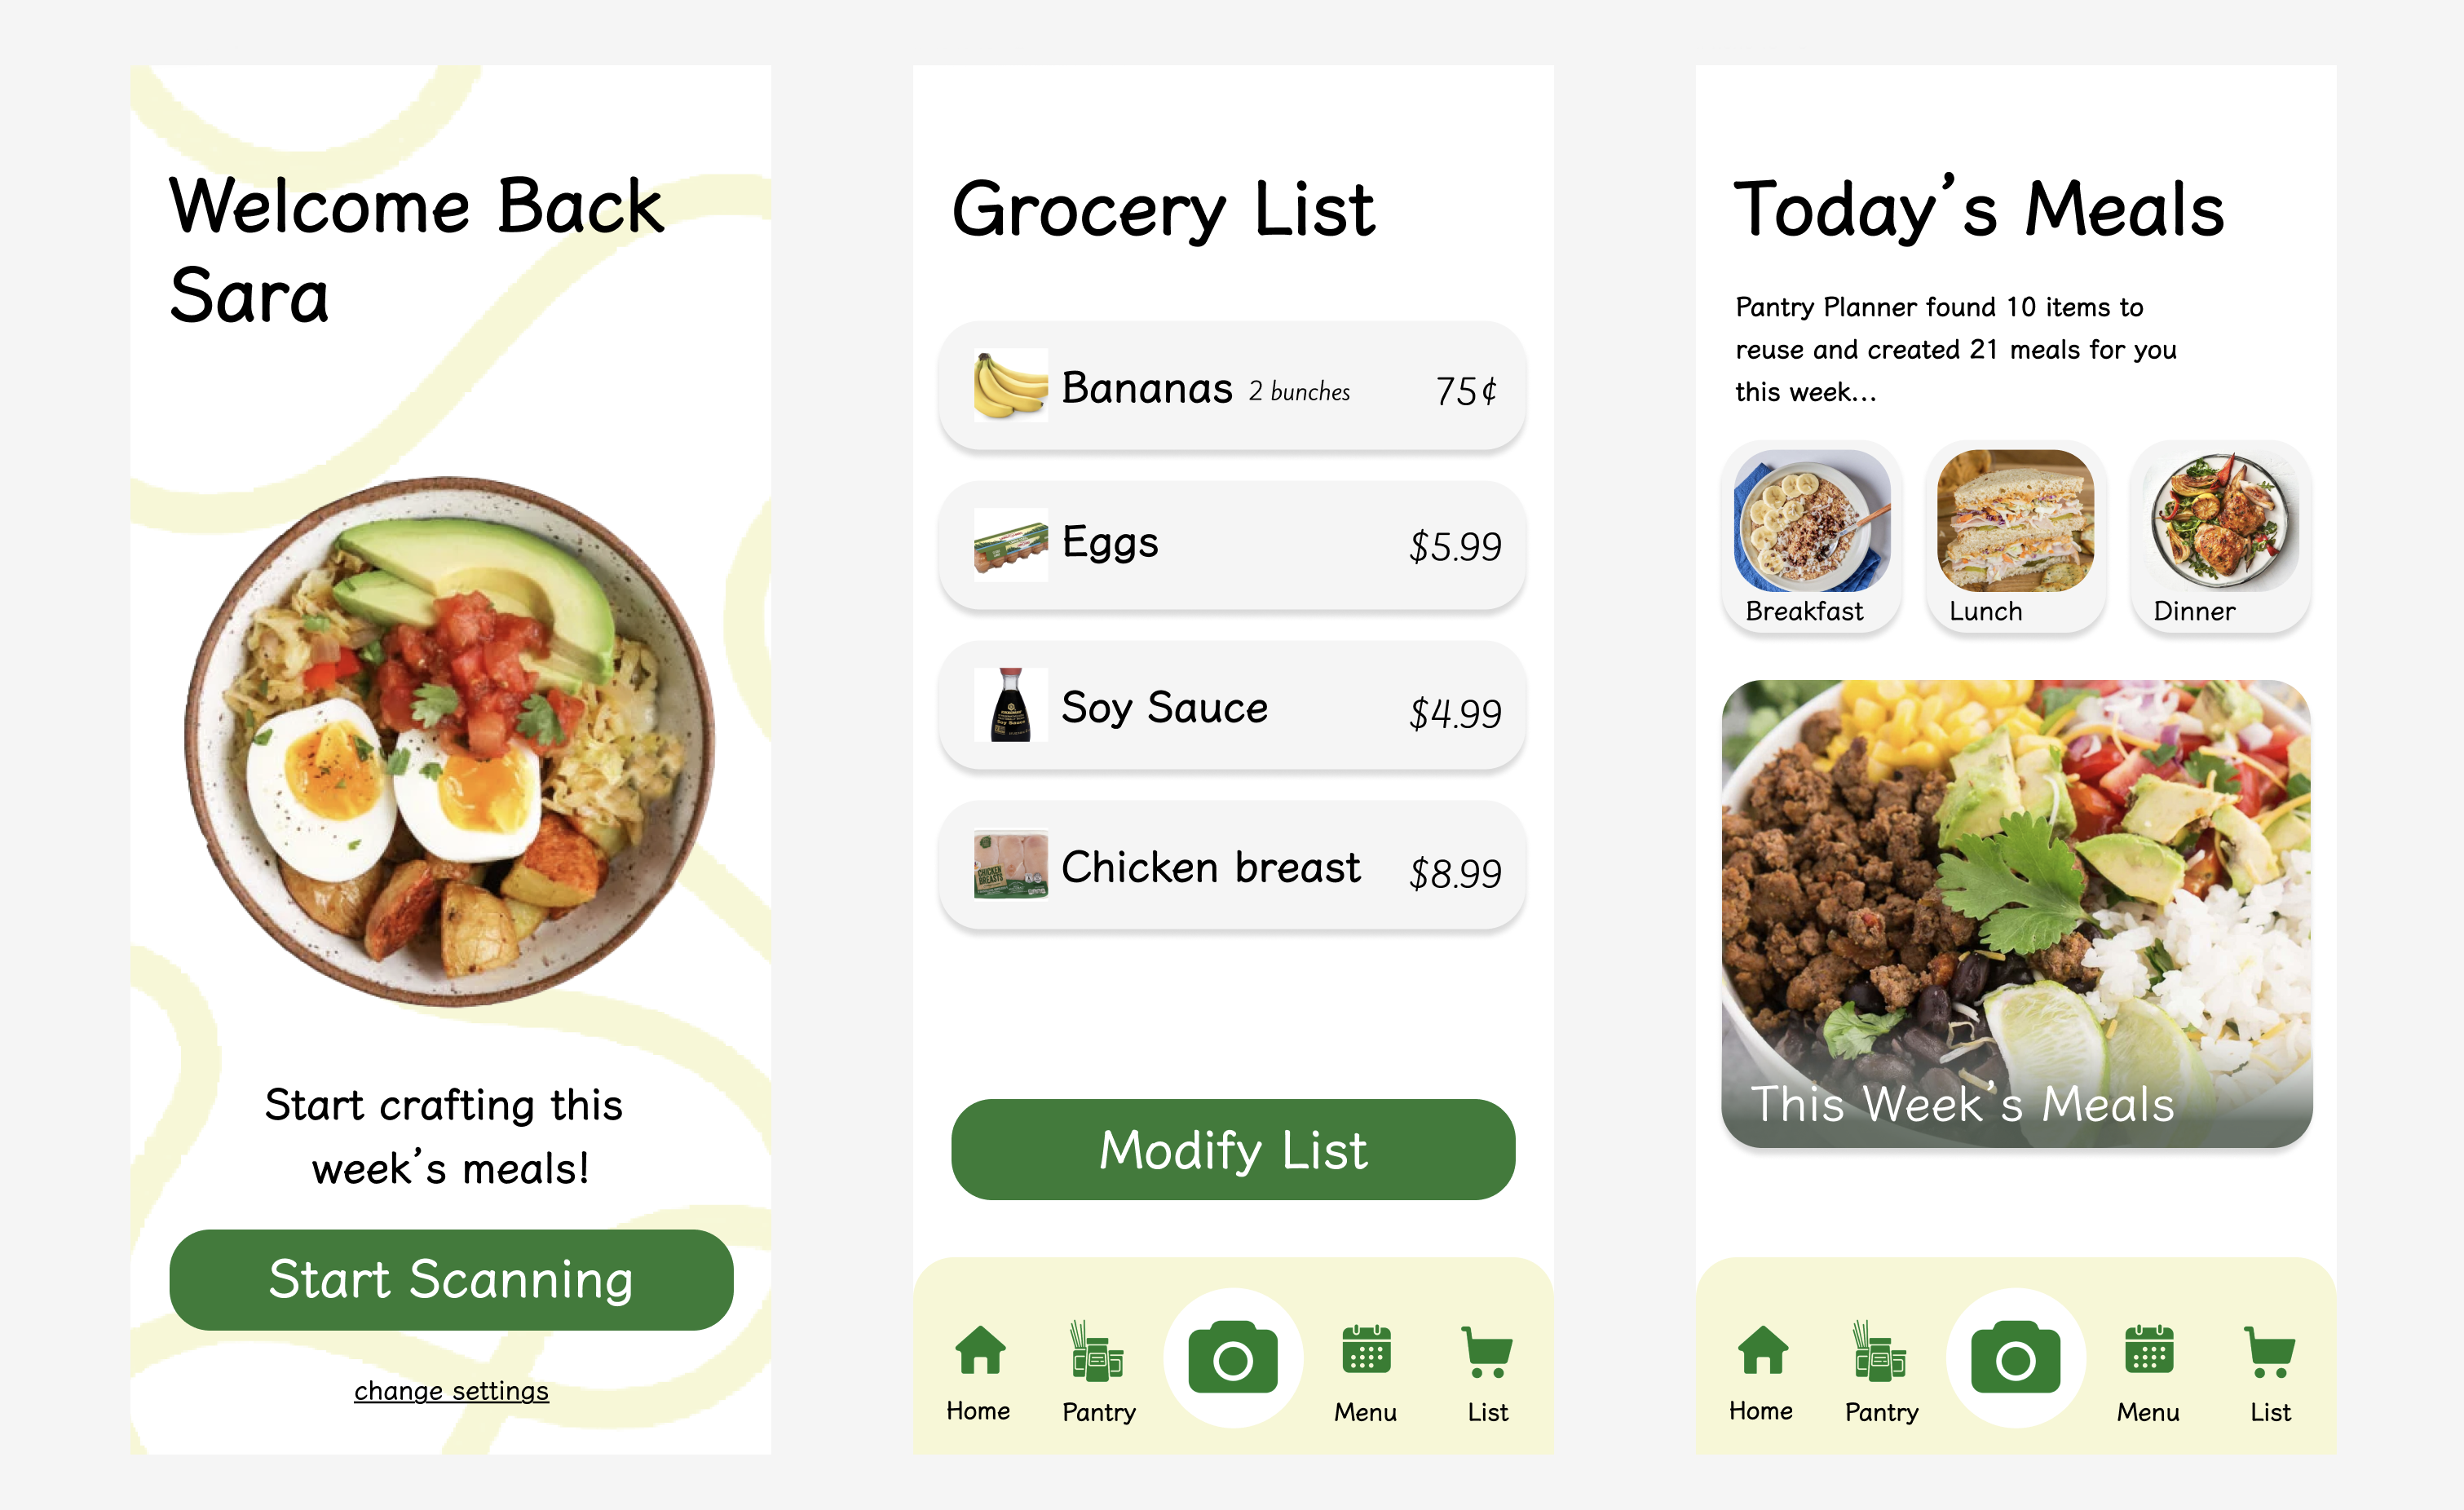
My final method was prototyping. In this step I turned my simple sketches into more solid renderings. I wanted to add color, pick fonts, and select images to develop the app’s personality. In creating these prototypes, I did some rearranging of elements and decided on how large certain features should be. For example, on the meal planning page, I felt it was important for the user to know how many ingredients were being reused and how many meals were being created. So, I felt this information should be at the top of the page rather than then bottom. Another decision I made, was getting the bottom navigation tab to be simple and intuitive. Since most users will need to be snapping photos to use the rest of the app’s features, this button should be larger than other features. Prototyping revealed to me the important parts that should stand out.
These ideation methods were a great way to jump start this app creation process. Doing these methods, I allowed myself time to think outside the box and give every idea time to shine. Once you start writing ideas down, it becomes easier to expand on them. Now that I have started doing this, its clear that no good product is complete without taking time to ideate. For my project, each method got me closer to crafting the final app. I encourage all professionals, not just creative ones, to start using these ideation methods to solve any sort of problem or as a way to kick start a project. You’ll be surprised of the ideas that come to mind.
Below is the full pdf report of my ideation process and findings, enjoy!