A bad habit of mine, unfortunately, is that I am known to throw myself headfirst into a project without much thought about where I will end up. This is mostly because I can get overwhelmed with the amount of work that it requires. I say this willingly, mostly because I know I can’t be the only one that does this, and I feel that it doesn’t get talked about enough. However, after knowing this about myself and many projects later, I now take time before the project to map out a plan. While this might not be revolutionary, I find it necessary before doing any of the actual work. Dividing and slicing up the work into smaller chunks or weekly tasks is exactly what I need, in order to stay focused and also feel like I’m slowly making my way to the finish line.
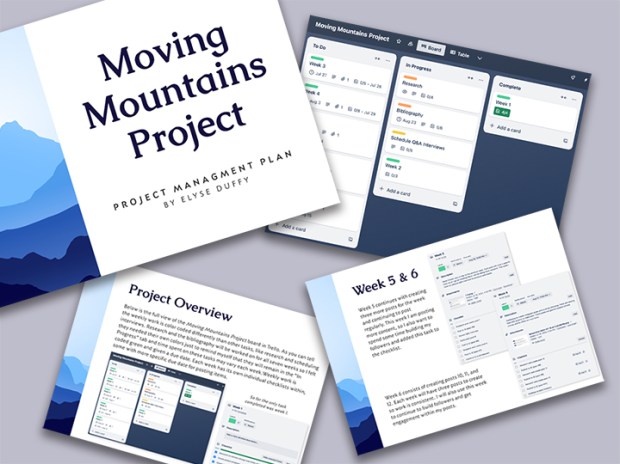
If you read my previous post, you’ll know I am starting a social media campaign called Moving Mountains Project. I created the Proposal last week and this week I created the project plan. You can find the plan here, which I encourage you to look over.
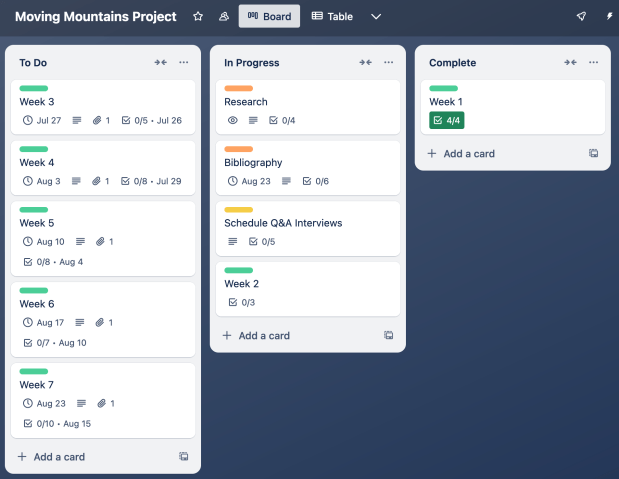
While this plan document was designed beautifully, it is also helping me dive more into the structure of the project and delegate tasks for the weeks ahead. I even used a project management system called Trello to visually organize my tasks and weekly to dos. Trello was very easy to learn, and I quickly set up my board to include three tabs: To Do, In Progress, and Completed. Within those tabs I have weekly cards with checklists broken down into the smallest action. While this is my first time doing this for a project, I know this won’t be my last because I instantly got a wave of relief after mapping out each task and when it’s due. It quickly became more manageable and allowed me to see just how I will get from this week to a few weeks from now with a completed campaign. Below is a visual of my Trello board.
Also, on this week’s agenda for me, was to find information on my campaign’s media of choice. Since my project will be posted to Instagram, I needed to refresh my memory on Instagram posting, best practices, and posting sizes. Because of the nature of the campaign, I want to make sure I come across as professional and factually accurate to my followers, and that means knowing how to post Instagram content as a professional, much different than our personal sites. One article on Instagram video lengths informed me that videos posted in the feed can be up to 60 minutes long, which I was unaware of. But while I don’t think it’s wise to post an hour-long video on Instagram, it does give me peace of mind that my videos can be long if I choose to make one. The article also went over what size ratio to make videos, which are 1080 x 1920 pixels. This was extremely helpful because I don’t want any of my content to be cropped when uploading to the site.
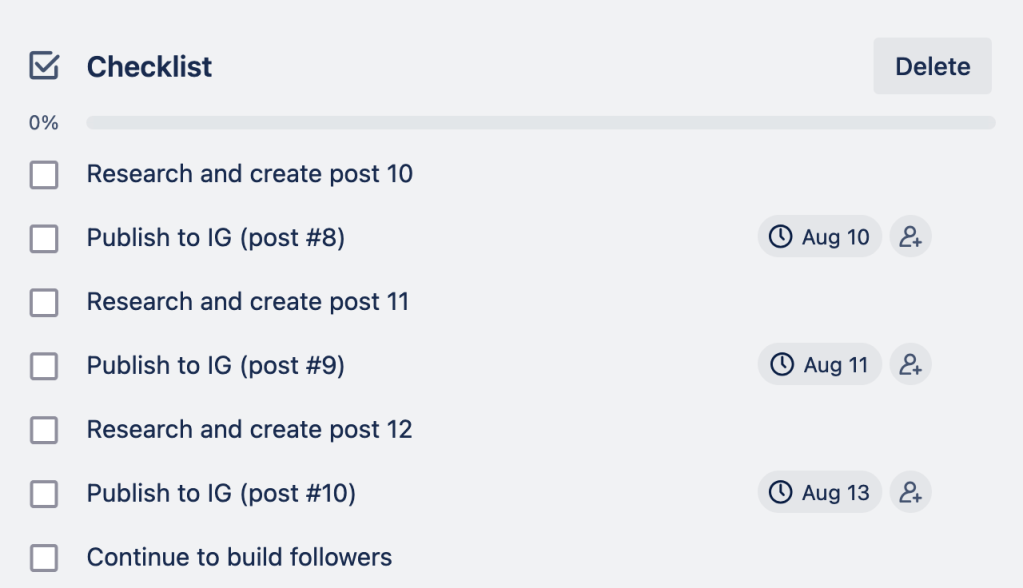
A second article I read was for Instagram’s best practices where they talked about having a posting schedule. It’s important to post often, but not too often. This may sound tricky and almost impossible, but this is where having a schedule and varying your posts come into play. After reading about how to vary your posts, it led me to create a more detailed schedule for my content in my Trello board. Below is a screenshot showing my week six’s checklist, where I have individual dates for when each post will go out. Having this strict schedule will help me consistently post content but to also not bombard my followers with too much.
After creating my project plan, building a Trello board, and reading up on Instagram need-to-knows, I find myself more organized than previous projects. This means I will be ready to tackle the week ahead and know exactly where to spend my time and energy this week. Being able to check off items on my to do list means that getting to the finish project will be quicker and overall feel easier to accomplish. I challenge you all to do the same the next time you are faced with your next work challenge or project. Your project planning in the beginning can really make all the difference between mediocre and great!
